Printer
- Introduction
- How to Setup a Printer
- How to Print Documents
- How to Print in Programs
- Accounts Payable Information System (APIS)
- Accounts Recievable Information System ( ARIS )
- File Management Information System ( FMIS.NET )
- Financial Statement Designer & Information System ( FSIS )
- General Ledger Information System ( GLIS )
- Marketing and Sales Information System ( MSIS.NET )
- Production Management Information System ( PMIS )
- Quotation and Booking Information System ( QBIS )
- Stock Inventory Management System ( SIMS )
- How to Refill Ink in Printer
Introduction
Welcome to Printer
Unlocking the power of seamless printing for Mgm Food & Commodities Corporation and Mgm Blendwell Corporation employees, Our mission is clear: to facilitate a productive and hassle-free printing experience that empowers you to accomplish more, with less effort.
These are the several printer kinds that our organization uses Epson LX-310, Epson LX310 + II, Epson L120, Epson L310, Epson L3210, Epson L5190, Epson L3150, Epson L210, Epson L220, Epson TM - C3510, Epson L3110, Canon LBP6000, Brother DCP T720DW, Fuji Film C2060.
Epson LX-310 Dot Matrix
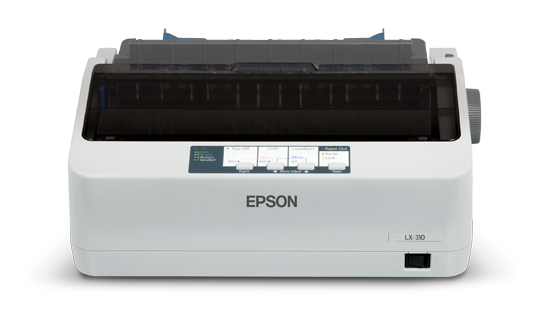
The Epson LX-310 dot matrix printer is a robust and reliable machine designed for high-volume printing tasks. It's a successor to the popular LX-300 model, offering enhanced performance and efficiency. Here's a description of its key features:
-
Dot Matrix Printing Technology: The LX-310 utilizes dot matrix printing technology, which means it creates characters and images by striking pins against an ink-soaked ribbon to transfer ink onto the paper. This technology is known for its durability and suitability for multi-part forms.
-
High-Speed Printing: One of the standout features of the LX-310 is its impressive print speed. It's capable of printing up to 357 characters per second (cps) at 12 characters per inch (cpi), making it ideal for tasks that require quick turnaround times.
-
Reliability: Epson printers are known for their reliability, and the LX-310 is no exception. It's built to withstand heavy usage and is well-suited for demanding environments such as warehouses, factories, and offices.
-
Multiple Connectivity Options: The LX-310 offers versatile connectivity options, including parallel, serial, and USB interfaces, ensuring compatibility with a wide range of systems and devices.
-
Compact Design: Despite its powerful performance, the LX-310 features a compact design that allows it to fit comfortably on desks or workstations without taking up too much space.
-
Energy Efficiency: Epson has incorporated energy-saving features into the LX-310 to minimize power consumption without compromising on performance, making it an environmentally-friendly choice.
-
Easy Maintenance: The printer is designed for easy maintenance, with user-friendly features such as a ribbon life of up to 4 million characters and a printhead life of 400 million strokes per wire.
-
Compatibility: It's compatible with various operating systems, including Windows, Linux, and macOS, ensuring seamless integration into existing IT infrastructures.
Overall, the Epson LX-310 dot matrix printer combines speed, reliability, and versatility, making it a popular choice for businesses and organizations that require high-quality printing of documents, forms, and reports.
Epson LX-310 + II Dot Matrix
The Epson LX-310+II dot matrix printer is a reliable and efficient machine designed for high-volume printing tasks. Here's a brief overview of its features:
-
Dot Matrix Printing Technology: Utilizes dot matrix printing technology for durable and multi-part form printing, ideal for businesses requiring continuous printing tasks.
-
High-Speed Printing: Offers impressive printing speeds, capable of printing up to 357 characters per second (cps) at 12 characters per inch (cpi), ensuring quick turnaround times.
-
Enhanced Connectivity: Provides versatile connectivity options including parallel, serial, and USB interfaces, ensuring compatibility with a variety of systems and devices.
-
Compact and Robust Design: Despite its powerful performance, the LX-310+II features a compact and sturdy design suitable for various work environments.
-
Reliable Performance: Built with Epson's renowned reliability, ensuring consistent and dependable printing over extended periods.
-
Easy Maintenance: Designed for easy maintenance with user-friendly features such as long-lasting ribbon life and printhead durability, reducing downtime and maintenance costs.
Overall, the Epson LX-310+II dot matrix printer combines speed, reliability, and versatility, making it an excellent choice for businesses requiring continuous and high-quality printing.
Epson L120

The Epson L120 is a compact and affordable ink tank printer designed for home and small office use. Here's a brief description of its features:
-
Ink Tank System: The L120 features Epson's innovative ink tank system, which uses large, refillable ink tanks instead of cartridges. This system reduces printing costs and makes it easy to refill ink when needed.
-
High-Quality Prints: Despite its affordability, the L120 delivers high-quality prints with vibrant colors and sharp text. It uses Epson's Micro Piezo technology to produce precise dot placement and smooth gradations.
-
Fast Printing Speeds: With a printing speed of up to 8.5 pages per minute (ppm) for black-and-white documents and 4.5 ppm for color documents, the L120 is suitable for everyday printing tasks.
-
Compact Design: The L120 has a compact and space-saving design, making it ideal for small desks or workspaces. Its sleek and modern appearance also complements any home or office environment.
-
Easy Setup and Operation: Setting up the L120 is straightforward, and it's easy to operate thanks to its user-friendly interface and control panel. The printer is also compatible with a variety of operating systems, including Windows and macOS.
-
Energy Efficient: Epson has designed the L120 to be energy-efficient, helping to reduce electricity consumption and operating costs over time.
-
Reliable Performance: Like other Epson printers, the L120 is built to be reliable and durable, ensuring consistent performance over its lifespan.
Overall, the Epson L120 ink tank printer offers an excellent balance of affordability, quality, and convenience, making it a popular choice for households and small businesses with basic printing needs.
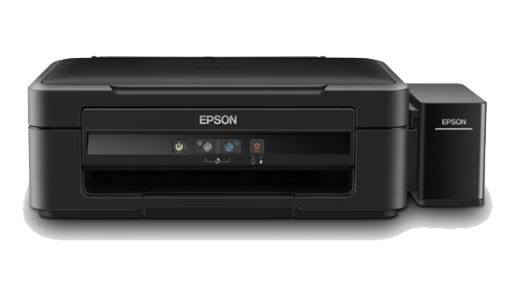
Epson L310

The Epson L310 is a reliable ink tank system printer designed for home and small office environments. Here's a concise description of its features:
-
Ink Tank System: Equipped with Epson's renowned ink tank system, the L310 allows for cost-effective printing with refillable ink tanks, reducing the need for frequent cartridge replacements.
-
High-Quality Prints: Despite its affordability, the L310 delivers impressive print quality with sharp text and vibrant colors, thanks to Epson's Micro Piezo technology.
-
Fast Printing Speeds: With a printing speed of up to 33 pages per minute (ppm) for black-and-white documents and 15 ppm for color documents, the L310 ensures efficient printing for various tasks.
-
Compact Design: The L310 boasts a compact and space-saving design, making it suitable for small desks or workspaces while complementing any home or office environment with its modern appearance.
-
Easy Setup and Operation: Setting up and operating the L310 is hassle-free, with a user-friendly interface and control panel. It's compatible with a range of operating systems, including Windows and macOS.
-
Energy Efficient: Epson prioritizes energy efficiency in the L310, helping users reduce electricity consumption and operating costs over time.
-
Reliable Performance: Built with Epson's renowned reliability, the L310 offers consistent performance and durability, ensuring dependable printing over its lifespan.
Overall, the Epson L310 ink tank system printer offers a compelling combination of affordability, quality, and convenience, making it a popular choice for households and small businesses seeking cost-effective and reliable printing solutions.
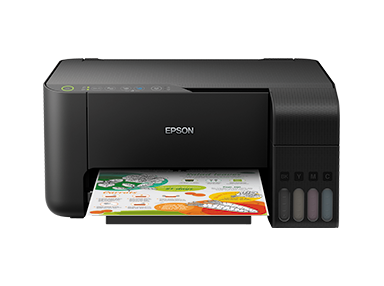
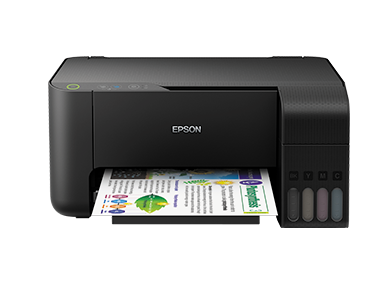
Epson EcoTank L3210

The Epson EcoTank L3210 is a versatile all-in-one ink tank printer designed for home and small office users. Here's a concise overview of its features:
-
Integrated Ink Tank System: The standout feature of the L3210 is its integrated ink tank system, which eliminates the need for cartridges and allows for convenient, mess-free refills. This system significantly reduces printing costs and minimizes downtime.
-
High-Quality Printing: Despite its cost-effectiveness, the L3210 delivers impressive print quality with sharp text and vibrant colors, thanks to Epson's Micro Piezo technology.
-
Print, Copy, Scan: As an all-in-one printer, the L3210 offers multifunctionality, allowing users to print, copy, and scan documents and photos with ease.
-
Fast Printing Speeds: With a printing speed of up to 33 pages per minute (ppm) for black-and-white documents and 15 ppm for color documents, the L3210 ensures efficient printing for various tasks.
-
Compact Design: The L3210 features a compact and space-saving design, making it suitable for small desks or workspaces. Its sleek and modern appearance adds a touch of style to any home or office environment.
-
Easy Setup and Operation: Setting up and operating the L3210 is straightforward, with a user-friendly interface and control panel. It's compatible with a range of operating systems, including Windows and macOS.
-
Wireless Connectivity: The L3210 offers wireless connectivity options, allowing users to print from their smartphones, tablets, and laptops without the need for cables.
-
Energy Efficient: Epson prioritizes energy efficiency in the L3210, helping users reduce electricity consumption and operating costs over time.
Overall, the Epson EcoTank L3210 is an excellent choice for users seeking a cost-effective, reliable, and versatile printing solution for their home or small office needs.
Epson L5190
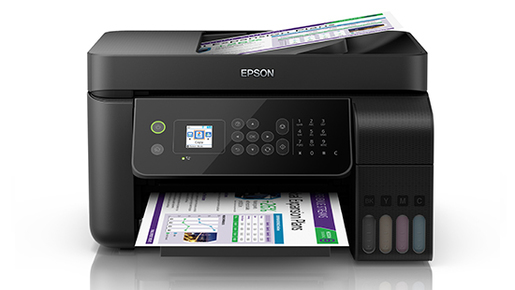
The Epson L5190 is a versatile all-in-one ink tank printer designed for home and small office users. Here's a brief summary of its key features:
-
Integrated Ink Tank System: The L5190 features Epson's innovative EcoTank system, which includes large, refillable ink tanks instead of traditional cartridges, reducing printing costs and minimizing downtime.
-
Print, Copy, Scan, Fax: As an all-in-one printer, the L5190 offers multifunctionality, allowing users to print, copy, scan, and fax documents and photos with ease.
-
High-Quality Printing: Despite its affordability, the L5190 delivers high-quality prints with sharp text and vibrant colors, thanks to Epson's PrecisionCore technology.
-
Wireless Connectivity: The L5190 offers wireless connectivity options such as Wi-Fi Direct and mobile printing, enabling users to print from their smartphones, tablets, and laptops without the need for cables.
-
Automatic Document Feeder (ADF): The built-in ADF allows for efficient scanning and copying of multi-page documents, saving time and effort.
-
Fast Printing Speeds: With a printing speed of up to 10.5 pages per minute (ppm) for black-and-white documents and 5 ppm for color documents, the L5190 ensures efficient printing for various tasks.
-
Compact Design: The L5190 boasts a compact and space-saving design, making it suitable for small desks or workspaces while still offering advanced features.
-
Easy Setup and Operation: Setting up and operating the L5190 is hassle-free, with a user-friendly interface and control panel. It's compatible with a range of operating systems, including Windows and macOS.
Overall, the Epson L5190 ink tank printer offers a compelling combination of affordability, quality, and convenience, making it an excellent choice for households and small businesses seeking cost-effective and reliable printing solutions.
Epson L3150
The Epson L3150 is a versatile all-in-one ink tank printer designed for home and small office users. Here's a concise summary of its features:
-
Integrated Ink Tank System: The L3150 features Epson's innovative EcoTank system, with refillable ink tanks, reducing printing costs and minimizing downtime.
-
Print, Copy, Scan: The L3150 offers multifunctionality, allowing users to print, copy, and scan documents and photos with ease.
-
High-Quality Printing: Despite its affordability, the L3150 delivers high-quality prints with sharp text and vibrant colors, thanks to Epson's Micro Piezo technology.
-
Wireless Connectivity: The L3150 offers wireless connectivity options such as Wi-Fi Direct and mobile printing, enabling users to print from their smartphones, tablets, and laptops without the need for cables.
-
Fast Printing Speeds: With a printing speed of up to 10.5 pages per minute (ppm) for black-and-white documents and 5 ppm for color documents, the L3150 ensures efficient printing for various tasks.
-
Compact Design: The L3150 boasts a compact and space-saving design, suitable for small desks or workspaces.
-
Easy Setup and Operation: Setting up and operating the L3150 is straightforward, with a user-friendly interface and control panel. It's compatible with various operating systems, including Windows and macOS.
Overall, the Epson L3150 ink tank printer offers a combination of affordability, quality, and convenience, making it an excellent choice for households and small businesses seeking cost-effective and reliable printing solutions.
Epson L210
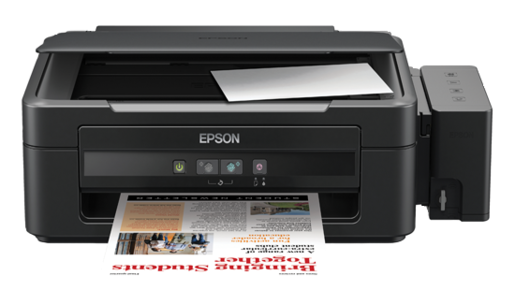
The Epson L210 is a reliable and efficient ink tank system printer designed for home and small office use. Here's a brief overview of its features:
-
Integrated Ink Tank System: The L210 features Epson's innovative ink tank system, allowing for cost-effective printing with refillable ink tanks instead of cartridges, reducing printing costs and minimizing downtime.
-
Print, Copy, Scan: The L210 offers multifunctionality, enabling users to print, copy, and scan documents and photos with ease.
-
High-Quality Printing: Despite its affordability, the L210 delivers high-quality prints with sharp text and vibrant colors, thanks to Epson's Micro Piezo technology.
-
Fast Printing Speeds: With a printing speed of up to 27 pages per minute (ppm) for black-and-white documents and 15 ppm for color documents, the L210 ensures efficient printing for various tasks.
-
Compact Design: The L210 features a compact and space-saving design, suitable for small desks or workspaces.
-
Easy Setup and Operation: Setting up and operating the L210 is straightforward, with a user-friendly interface and control panel. It's compatible with various operating systems, including Windows and macOS.
Overall, the Epson L210 ink tank printer offers a combination of affordability, quality, and convenience, making it a popular choice for households and small businesses seeking cost-effective and reliable printing solutions.
Epson L220
The Epson L220 is a compact and reliable ink tank system printer designed for home and small office users. Here's a brief overview of its features:
-
Integrated Ink Tank System: The L220 features Epson's innovative ink tank system, which uses refillable ink tanks instead of cartridges, reducing printing costs and minimizing downtime.
-
Print, Copy, Scan: The L220 offers multifunctionality, allowing users to print, copy, and scan documents and photos with ease.
-
High-Quality Printing: Despite its affordability, the L220 delivers high-quality prints with sharp text and vibrant colors, thanks to Epson's Micro Piezo technology.
-
Fast Printing Speeds: With a printing speed of up to 27 pages per minute (ppm) for black-and-white documents and 15 ppm for color documents, the L220 ensures efficient printing for various tasks.
-
Compact Design: The L220 features a compact and space-saving design, making it suitable for small desks or workspaces.
-
Easy Setup and Operation: Setting up and operating the L220 is straightforward, with a user-friendly interface and control panel. It's compatible with various operating systems, including Windows and macOS.
Overall, the Epson L220 ink tank printer offers a combination of affordability, quality, and convenience, making it a popular choice for households and small businesses seeking cost-effective and reliable printing solutions.
Epson TM - C3510
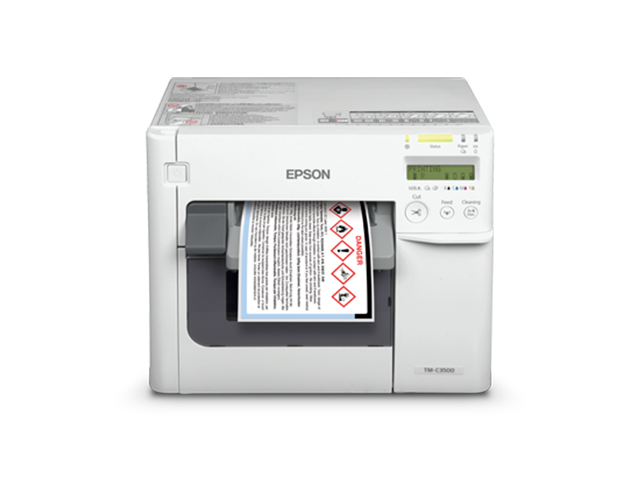
The Epson TM-C3510 is a high-speed, full-color label printer designed for various industries, including retail, healthcare, and manufacturing. Here's a concise overview of its features:
-
Durable Color Label Printing: The TM-C3510 uses Epson's MicroPiezo inkjet technology to produce durable, high-quality color labels with crisp text and vibrant graphics.
-
High-Speed Printing: With printing speeds of up to 4 inches per second, the TM-C3510 ensures fast label production, ideal for high-volume printing environments.
-
Versatile Label Printing: This printer supports a wide range of label sizes and types, including glossy, matte, and synthetic labels, offering versatility to meet diverse printing needs.
-
Ease of Use: The TM-C3510 features easy-to-use software for label design and printing, making it convenient for users to create and print labels quickly.
-
Reliability and Durability: Epson printers are known for their reliability, and the TM-C3510 is no exception. It's built to withstand demanding printing environments and delivers consistent performance.
-
Economical Operation: The TM-C3510 utilizes individual ink cartridges, allowing users to replace only the colors they need, reducing waste and saving money on consumables.
-
Advanced Connectivity: With USB and Ethernet connectivity options, the TM-C3510 can easily integrate into existing systems and networks for seamless printing.
Overall, the Epson TM-C3510 is a reliable, high-speed color label printer suitable for various industries, offering durability, versatility, and cost-effective operation.
Epson L3110
The Epson L3110 is a versatile all-in-one ink tank printer designed for home and small office users. Here's a brief overview of its features:
-
Integrated Ink Tank System: The L3110 features Epson's innovative EcoTank system, with refillable ink tanks instead of cartridges, reducing printing costs and minimizing downtime.
-
Print, Copy, Scan: The L3110 offers multifunctionality, enabling users to print, copy, and scan documents and photos with ease.
-
High-Quality Printing: Despite its affordability, the L3110 delivers high-quality prints with sharp text and vibrant colors, thanks to Epson's Micro Piezo technology.
-
Fast Printing Speeds: With a printing speed of up to 33 pages per minute (ppm) for black-and-white documents and 15 ppm for color documents, the L3110 ensures efficient printing for various tasks.
-
Compact Design: The L3110 features a compact and space-saving design, suitable for small desks or workspaces.
-
Wireless Connectivity: The L3110 offers wireless connectivity options such as Wi-Fi Direct and mobile printing, enabling users to print from their smartphones, tablets, and laptops without the need for cables.
-
Easy Setup and Operation: Setting up and operating the L3110 is straightforward, with a user-friendly interface and control panel. It's compatible with various operating systems, including Windows and macOS.
Overall, the Epson L3110 ink tank printer offers a combination of affordability, quality, and convenience, making it a popular choice for households and small businesses seeking cost-effective and reliable printing solutions.
Canon LBP6000
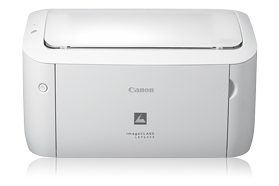
The Canon LBP6000 is a compact and affordable monochrome laser printer designed for home and small office users. Here's a brief overview of its features:
-
Monochrome Laser Printing: The LBP6000 specializes in black-and-white printing, offering crisp text and sharp graphics for documents and reports.
-
Fast Printing Speeds: With a printing speed of up to 19 pages per minute (ppm), the LBP6000 ensures efficient printing for various tasks, ideal for users with moderate printing needs.
-
Quick First Print: The printer has a quick first print time of approximately 7.8 seconds, allowing users to get their documents printed quickly without waiting.
-
Compact Design: The LBP6000 features a compact and space-saving design, making it suitable for small desks or workspaces.
-
Energy Efficient: Canon has designed the LBP6000 to be energy-efficient, helping users reduce electricity consumption and operating costs over time.
-
Easy Setup and Operation: Setting up and operating the LBP6000 is straightforward, with a user-friendly interface and control panel.
Overall, the Canon LBP6000 monochrome laser printer offers an excellent balance of affordability, speed, and compactness, making it a practical choice for users looking for reliable black-and-white printing solutions.
Brother DCP - T720DW
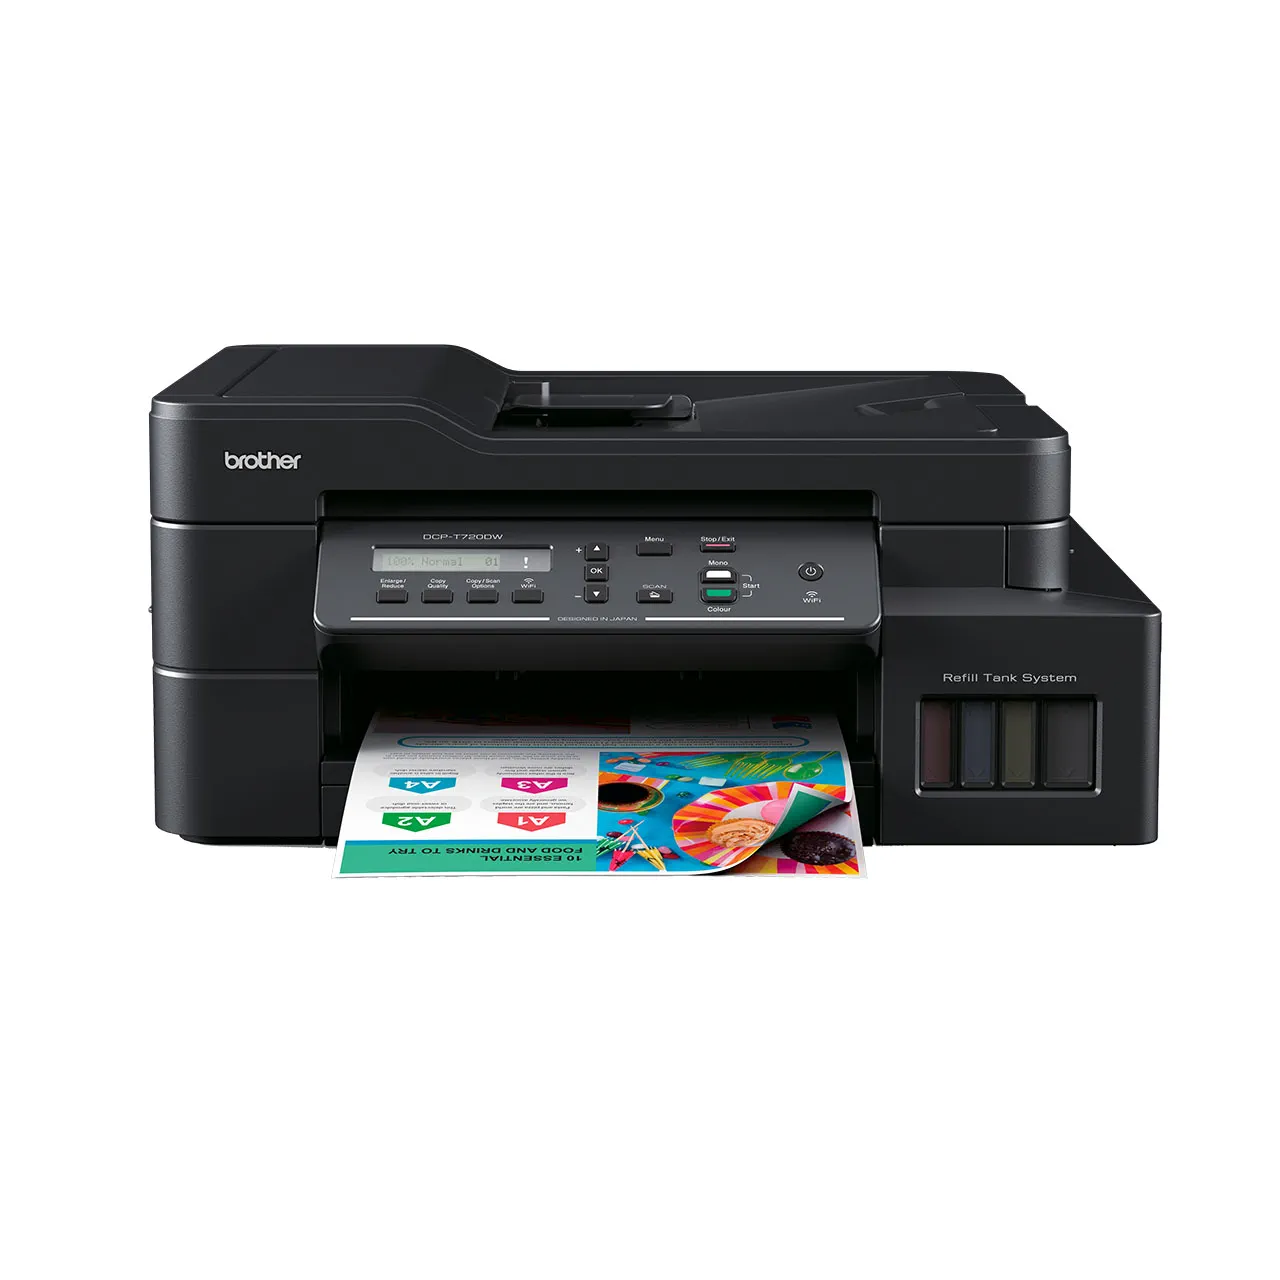
The Brother DCP-T720DW is a versatile all-in-one ink tank printer designed for home and small office users. Here's a brief overview of its features:
-
Integrated Ink Tank System: The DCP-T720DW features Brother's innovative ink tank system, allowing for cost-effective printing with refillable ink tanks instead of cartridges, reducing printing costs and minimizing downtime.
-
Print, Copy, Scan: The DCP-T720DW offers multifunctionality, enabling users to print, copy, and scan documents and photos with ease.
-
High-Quality Printing: Despite its affordability, the DCP-T720DW delivers high-quality prints with sharp text and vibrant colors, thanks to Brother's advanced printing technology.
-
Fast Printing Speeds: With a printing speed of up to 12 pages per minute (ppm) for black-and-white documents and 10 ppm for color documents, the DCP-T720DW ensures efficient printing for various tasks.
-
Wireless Connectivity: The DCP-T720DW offers wireless connectivity options such as Wi-Fi Direct and mobile printing, enabling users to print from their smartphones, tablets, and laptops without the need for cables.
-
Automatic Document Feeder (ADF): The built-in ADF allows for efficient scanning and copying of multi-page documents, saving time and effort.
-
Compact Design: The DCP-T720DW features a compact and space-saving design, suitable for small desks or workspaces.
-
Easy Setup and Operation: Setting up and operating the DCP-T720DW is straightforward, with a user-friendly interface and control panel. It's compatible with various operating systems, including Windows and macOS.
Overall, the Brother DCP-T720DW ink tank printer offers a combination of affordability, quality, and convenience, making it a popular choice for households and small businesses seeking cost-effective and reliable printing solutions.
Fuji Film ApeosPort C2060
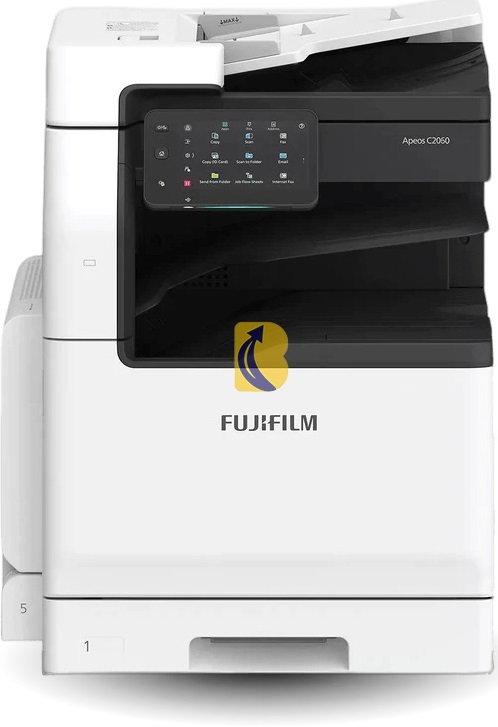
The Fuji Xerox ApeosPort C2060 is a high-performance multifunction printer designed for demanding office environments. Here's a concise overview of its features:
-
Multifunctionality: The ApeosPort C2060 offers print, copy, scan, and optional fax capabilities, consolidating multiple office tasks into one device.
-
High-Quality Printing: With Fuji Xerox's advanced printing technology, the ApeosPort C2060 delivers professional-quality prints with sharp text and vibrant colors.
-
Fast Printing Speeds: This printer boasts impressive printing speeds, allowing users to complete large printing jobs quickly and efficiently.
-
Advanced Scanning Features: The ApeosPort C2060 comes equipped with advanced scanning features, including scan-to-email, scan-to-folder, and scan-to-USB, enhancing productivity and document management.
-
Large Touchscreen Display: Featuring a large, intuitive touchscreen display, users can easily navigate through various functions and settings, streamlining operation and workflow.
-
Security Features: Fuji Xerox prioritizes security with advanced security features such as user authentication, data encryption, and secure print release, ensuring sensitive information remains protected.
-
Customizable Workflow Solutions: The ApeosPort C2060 supports customizable workflow solutions, allowing businesses to tailor the printer's capabilities to their specific needs and optimize productivity.
Overall, the Fuji Xerox ApeosPort C2060 is a versatile and reliable multifunction printer designed to meet the demanding requirements of modern office environments, offering high-quality printing, advanced features, and enhanced productivity.
How to Setup a Printer
A few key steps to ensure that your printer is properly installed and ready to use.
Here's a general guide:
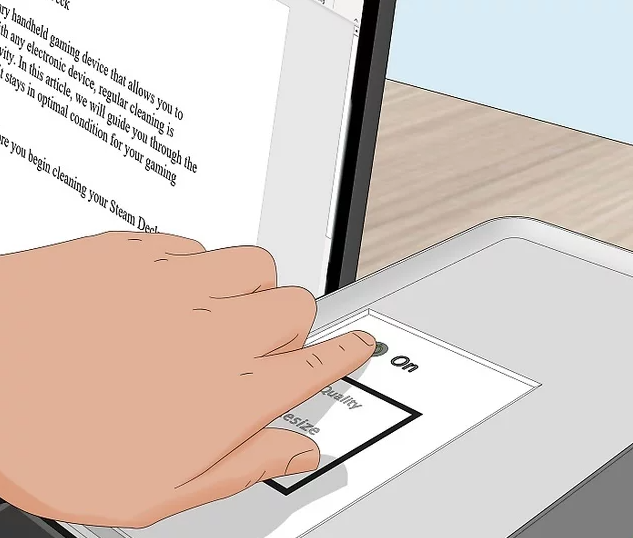
Plug in the printer's power cable to the outlet.
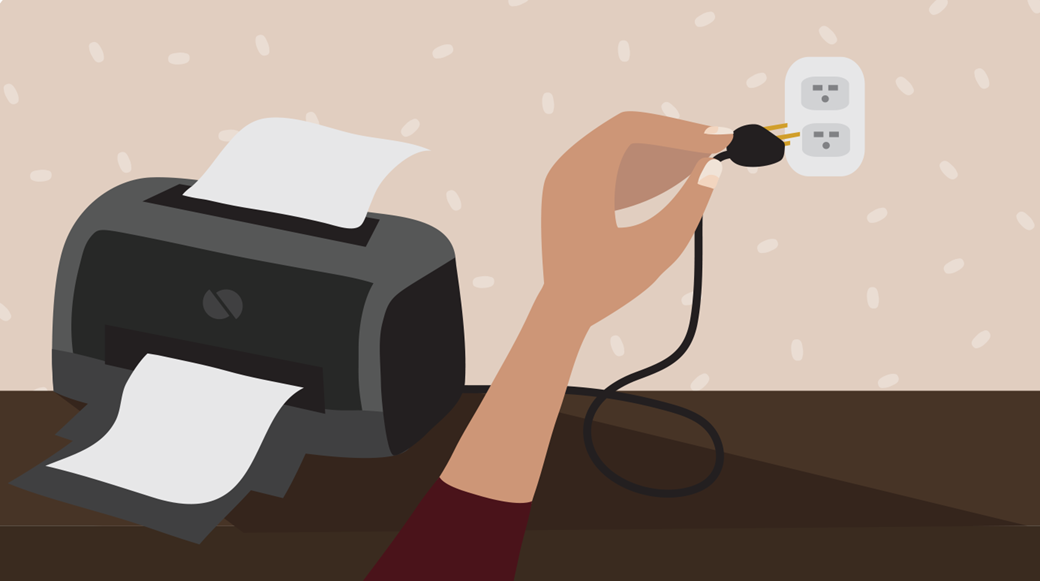
Before doing anything else, it's important to make sure your printer is plugged in and ready.
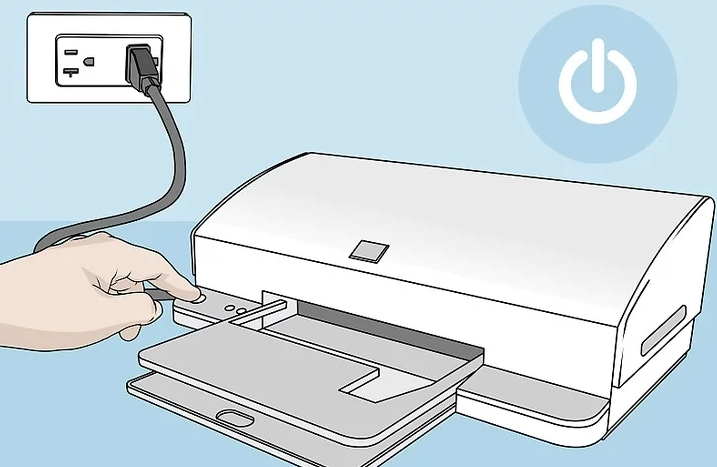
Connect the included cable (usually a USB cable) from the printer to the computer or laptop.
Note: The process will be different if you're using a wireless printer.

How to Print Documents
Microsoft Excel
Microsoft Excel is a powerful spreadsheet program developed by Microsoft.
Here's a general guide:
Make sure that your printer is connected and turned on. If your printer connects over WI-FI, this will mean making sure that you're on the same Internet network as your printer; otherwise, you'll need to plug your printer's USB cable into your computer or Laptop.
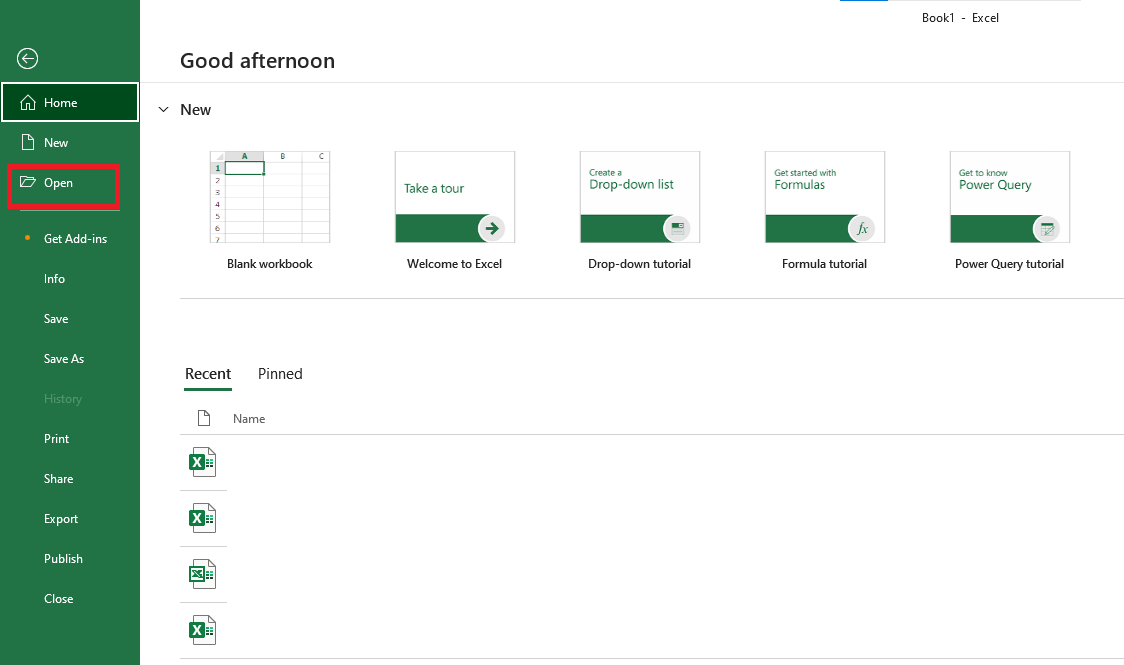
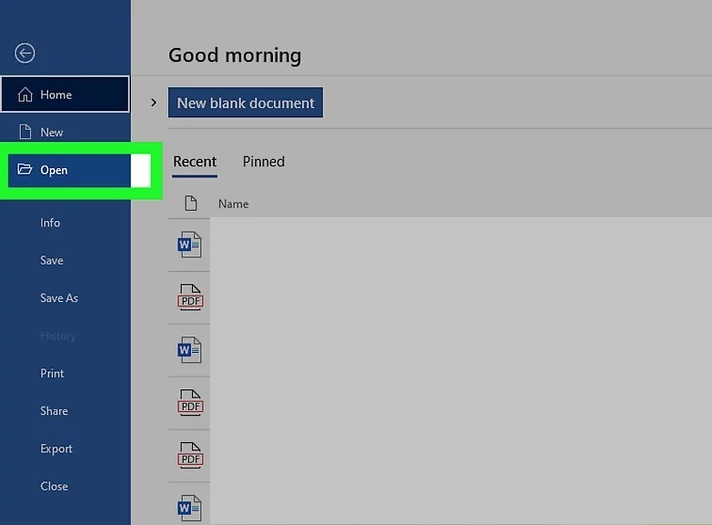
Open the document you want to print. This could be a PDF, Word document, Excel spreadsheet, or even photos.
Note: Use the File Explorer to find the file if needed.
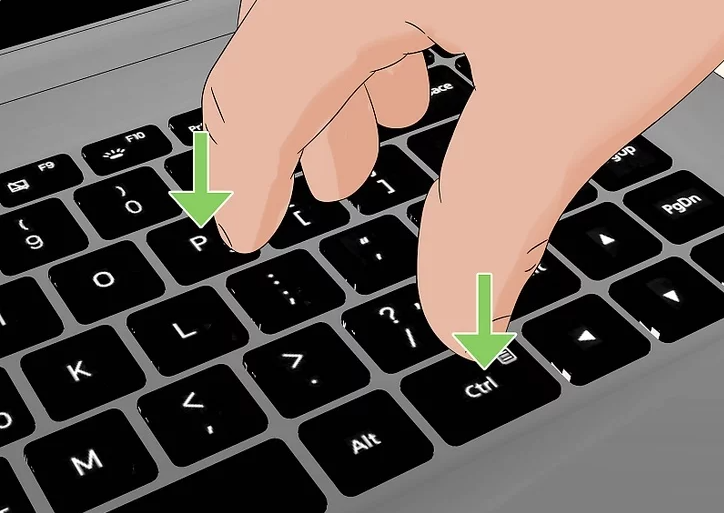
On your keyboard, press Ctrl+P. This is the keyboard shortcut to open the print menu.
- You can also manually open the print menu by clicking the printer icon.
- In some apps, you'll need to click File and then Print.
- The print menu may look different depending on the application used to open your file.
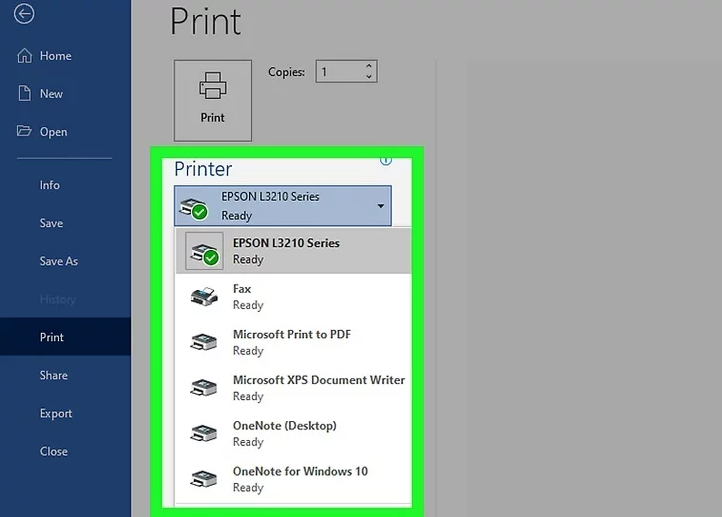
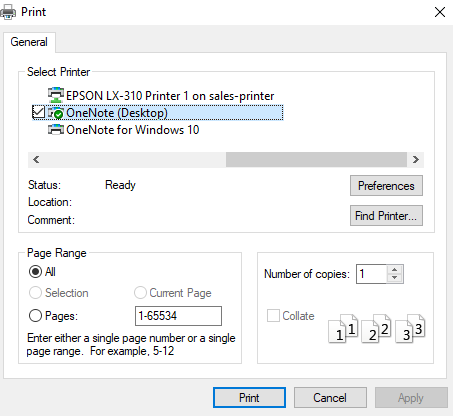
Select your printer. Click the "Printer" drop-down box, then click your printer's name.
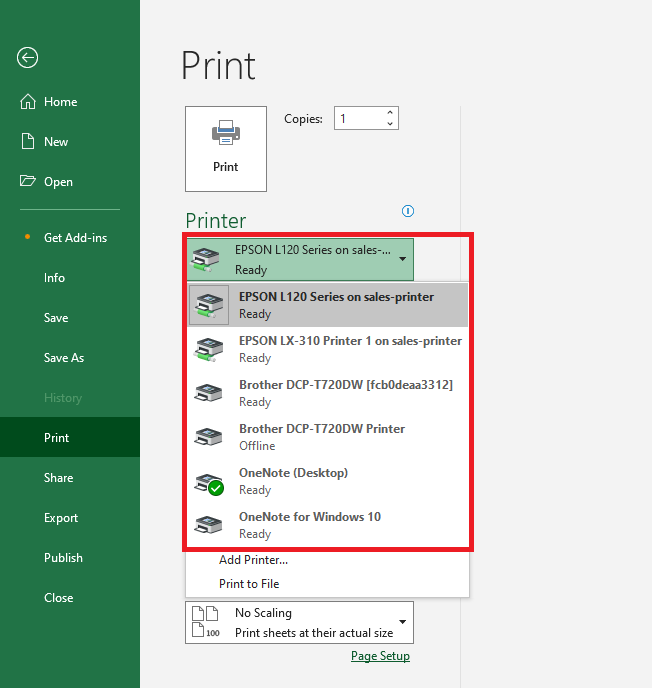
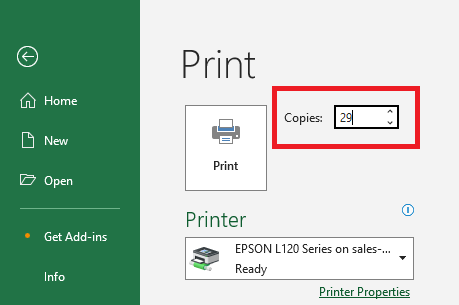
Select a number of copies. In the "Copies" box, type in the number of copies of the document that you'd like to print.
Note: This is different than the number of pages.
Microsoft Word
Microsoft Word is a widely used word processing program developed by Microsoft.
Here's a general guide:
Make sure that your printer is connected and turned on. If your printer connects over WI-FI, this will mean making sure that you're on the same Internet network as your printer; otherwise, you'll need to plug your printer's USB cable into your computer or Laptop.
Open the document you want to print. This could be a PDF, Word document, Excel spreadsheet, or even photos.
Note: Use the File Explorer to find the file if needed.
On your keyboard, press Ctrl+P. This is the keyboard shortcut to open the print menu.
- You can also manually open the print menu by clicking the printer icon.
- In some apps, you'll need to click File and then Print.
- The print menu may look different depending on the application used to open your file.
Select your printer. Click the "Printer" drop-down box, then click your printer's name.
Select a number of copies. In the "Copies" box, type in the number of copies of the document that you'd like to print.
Note: This is different than the number of pages.

Portable Document Format ( PDF )
PDF (Portable Document Format) is a file format developed by Adobe that preserves the layout and formatting of documents, making them easily viewable and printable across different platforms and devices.
Here's a general guide:
Open the PDF: Double-click the PDF file you want to print. It should open in your default PDF viewer. If you don't have one installed, you can download Adobe Acrobat Reader or another PDF viewer from the internet.
Note: Use the File Explorer to find the file if needed.
Select Print: Once the PDF is open, you can typically find the print option in the menu bar at the top. Click on "Printer logo" in the menu bar and then select "Print." Alternatively, you can use the keyboard shortcut Ctrl + P.
Note: A document can be printed using a different interface browser, such as Google Chrome or Microsoft Edge.
Microsoft Edge Browser

Google Chrome Browser

Select Printer: In the print dialog, select the printer you want to use from the "Destination" section. Make sure the correct printer is selected.
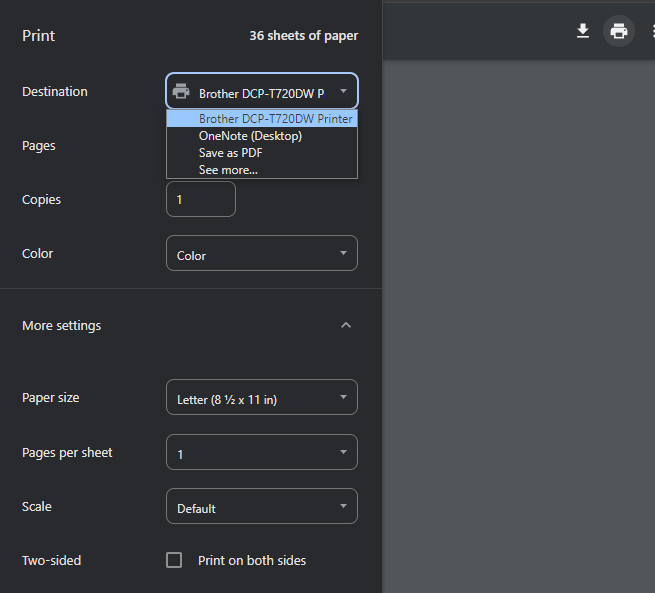
Adjust print settings (optional): A print dialog box will appear, allowing you to adjust various print settings such as the printer you want to use, the number of copies, page range, orientation (portrait or landscape), and paper size. Make sure these settings match your preferences.

Print: Once you've adjusted the settings to your liking, click the "Print" button in the print dialog box to start printing. The printer will then begin processing the document and printing it according to your specified settings.

How to Print in Programs
Accounts Payable Information System (APIS)
An Mgm Food & Commodities Corporation and Mgm Blendwell Corporation organization may manage accounts payable more efficiently and automatically by using an accounts payable information system (APIS), which is a software program or set of tools.
Here's a general guide:
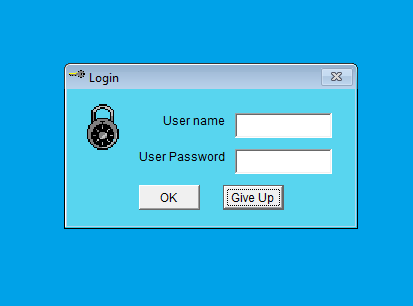
First of all, login into your account at APIS.
We employ MGM Blendwell APIS and MGM Foods APIS, two distinct program types under APIS, in our organization.
MGM Blendwell
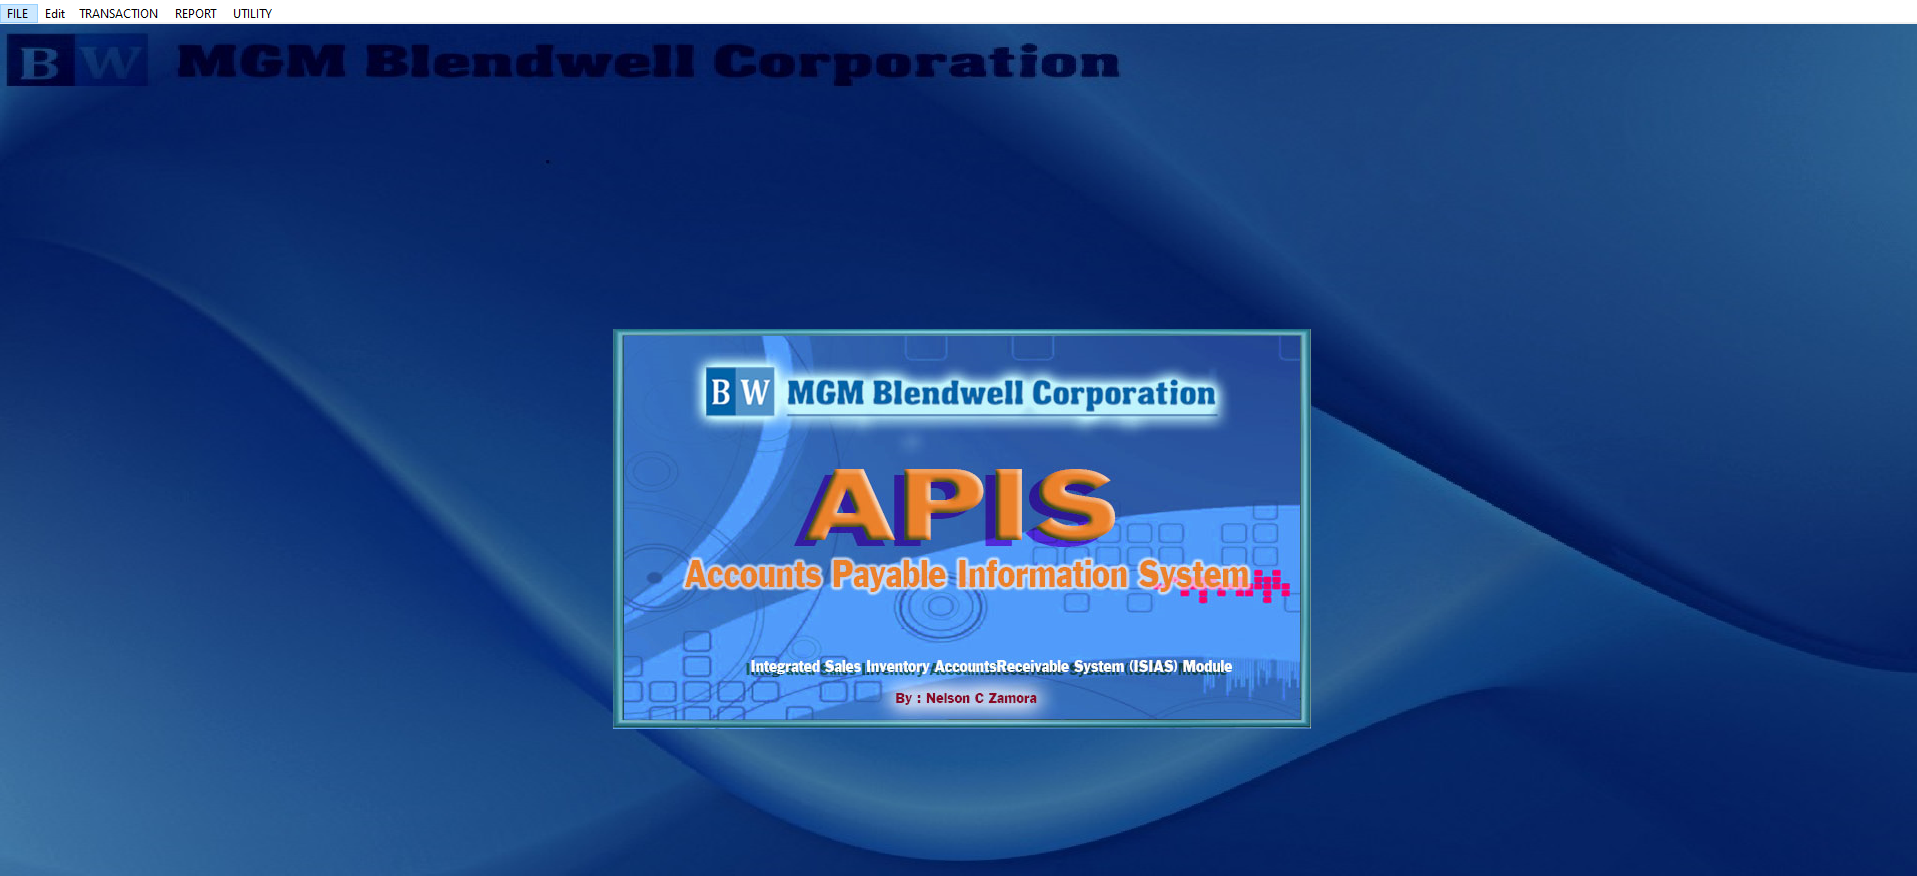
MGM Foods

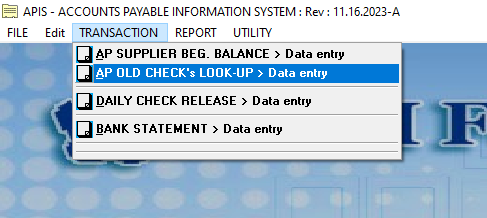
Usually, you can print documents from the menu in the upper left corner, but Transaction and Reports are the most typical uses for it.
Transaction
The transaction menu offers a variety of options for printing documents.
Blendwell Transaction Interface

Foods Transaction Interface
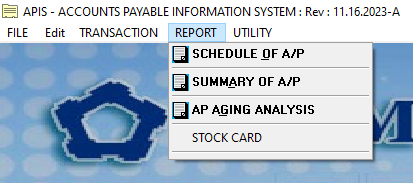
Reports
The Reports menu offers a variety of options for printing documents.
Blendwell Report Interface
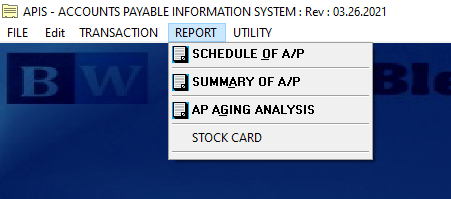
Food Report Interface
There are four distinct options under the Transaction menu for printing documents or files.
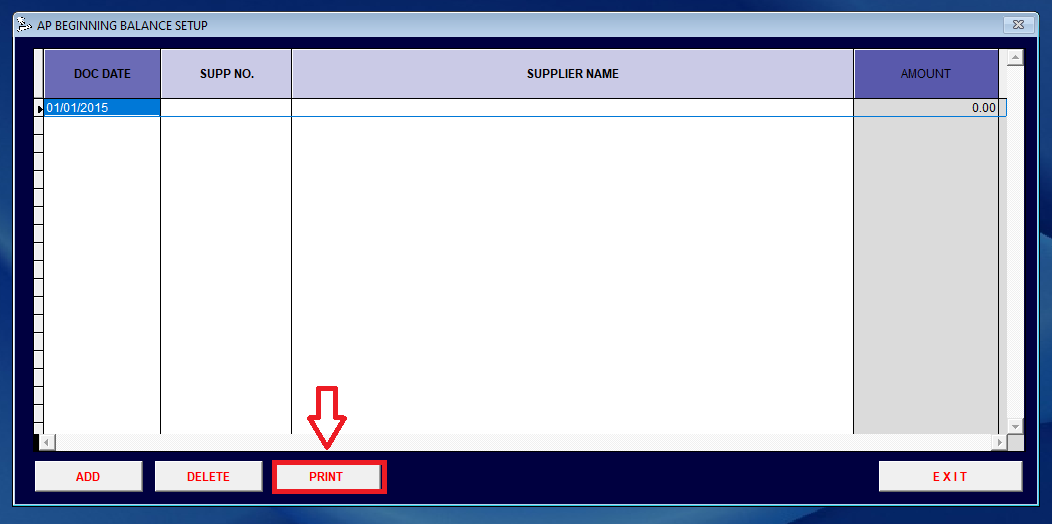
AP SUPPLIER BEG. BALANCE > Data entry
Blendwell - AP Beginning Balance Setup UI or Interface
When you click the AP Beginning Balance configuration option in the Transaction menu, follow these steps:
Step 1: The UI for the AP Beginning Balance Setup likewise displays "PRINT" and Click it.
Step 2: After clicking the "PRINT" button, another option appears. Click it.
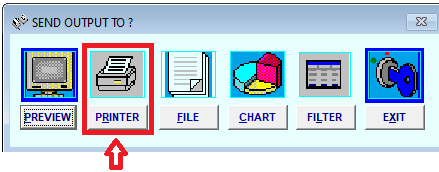
Step 3: Select your printer's name and click "Print".
Foods - AP Beginning Balance Setup UI or Interface
AP OLD CHECK's LOOK-UP > Data entry
Blendwell - AP Look-Up Table Only UI or Interface
Foods - AP Look-Up Table Only UI or Interface
DAILY CHECK RELEASE > Data entry
BANK STATEMENT > Data entry
Accounts Recievable Information System ( ARIS )
File Management Information System ( FMIS.NET )
Financial Statement Designer & Information System ( FSIS )
General Ledger Information System ( GLIS )
Marketing and Sales Information System ( MSIS.NET )
Production Management Information System ( PMIS )
Quotation and Booking Information System ( QBIS )
Stock Inventory Management System ( SIMS )
How to Refill Ink in Printer
To refill ink in a printer, first, ensure the device is turned off and unplugged for safety. Open the printer’s cover to access the ink reservoirs. Identify the tanks that need replenishing and prepare the appropriate ink bottles. Gently shake the bottles to mix the ink before opening them. Carefully pour the ink into each tank, being mindful not to overfill. Once the tanks are refilled, securely close them and shut the printer cover. After reconnecting the power and turning the printer back on, follow any necessary steps to initialize the new ink. Finally, print a test page to confirm that the ink flow is functioning properly.
Epson LX-310 Dot Matrix
Step 1: Gather Required Tools
- New ribbon cartridge for Epson LX-310
- Clean, lint-free cloth
Step 2: Power Off the Printer
- Turn off the printer and unplug it from the power source to avoid any electrical hazards.
Step 3: Open the Printer Cover
- Lift the top cover of the printer to access the ribbon mechanism.
Step 4: Remove the Old Ribbon
- Locate the ribbon cartridge holder. This is usually held in place by two clips.
- Carefully unclip the old ribbon cartridge by pulling the clips outward.
- Once free, lift the cartridge out of the printer.
Step 5: Prepare the New Ribbon
- Take your new ribbon cartridge out of the packaging.
- Check to ensure that it is indeed for the Epson LX-310 model.
Step 6: Install the New Ribbon
- Align the new ribbon cartridge with the holder in the printer.
- Insert the cartridge, making sure it fits securely into the clips.
- Ensure that the ribbon is feeding correctly through the print head and that it is not twisted.
Step 7: Close the Printer Cover
- Once the new ribbon is installed, lower the top cover of the printer.
Step 8: Power On the Printer
- Plug the printer back into the power source.
- Turn on the printer.
Step 9: Perform a Test Print
- Once the printer is powered on, perform a test print to ensure that the new ribbon is working properly.
Step 10: Clean Up
- Dispose of the old ribbon cartridge responsibly and clean any excess dust or debris from around the printer.
Epson LX-310 + II Dot Matrix
Step 1: Gather Required Tools
- New ribbon cartridge compatible with Epson LX-310 or LX-310 II
- Clean, lint-free cloth (optional for cleaning)
Step 2: Power Off the Printer
- Turn off the printer and unplug it from the electrical outlet for safety.
Step 3: Open the Printer Cover
- Lift the top cover of the printer to access the ribbon mechanism.
Step 4: Locate the Ribbon Cartridge
- Identify the ribbon cartridge holder. You will see two clips holding the cartridge in place.
Step 5: Remove the Old Ribbon
- Carefully press the clips away from the ribbon cartridge to release it.
- Lift the old ribbon cartridge out gently.
Step 6: Prepare the New Ribbon
- Take the new ribbon cartridge out of its packaging and inspect it to ensure it's the correct type for your printer model.
Step 7: Install the New Ribbon
- Align the new ribbon cartridge with the holder.
- Insert the new cartridge into the printer, ensuring it fits securely and the clips lock into place.
- Make sure the ribbon is properly threaded through the print head. It should pass over the print head and below it without being twisted.
Step 8: Close the Printer Cover
- Once you have installed the new ribbon, lower the top cover of the printer until it clicks into place.
Step 9: Power On the Printer
- Plug the printer back into the power outlet.
- Turn on the printer.
Step 10: Perform a Test Print
- After the printer is powered on, perform a test print to check that the new ribbon is functioning correctly.
Step 11: Clean Up
- Dispose of the old ribbon cartridge properly, and clean around the printer if needed.
Epson L120
Materials Needed:
- Compatible ink bottles (specific to Epson L120)
- Gloves (optional, to keep your hands clean)
- Paper towels or cloth (for cleaning any spills)
Steps:
-
Turn Off the Printer:
- Ensure the printer is turned off and unplugged from the power source to avoid any electrical hazards and to prevent any accidental operation.
-
Open the Printer Cover:
- Lift the printer cover to access the ink tank compartments. You should be able to see the ink tanks at the side of the printer.
-
Locate the Ink Tanks:
- The Epson L120 has four separate ink tanks: black, cyan, magenta, and yellow. Identify the tank that needs refilling by checking the ink levels. Each tank has a transparent window, so you can see the ink level inside.
-
Open the Ink Tank Cover:
- Open the cover of the ink tank you need to refill. There’s usually a small latch or cover that you need to lift.
-
Remove the Ink Bottle Cap:
- Take the ink bottle for the color you are refilling. Remove the cap from the ink bottle.
-
Refill the Ink Tank:
- Insert the nozzle of the ink bottle into the tank’s refill hole. Gently squeeze the bottle to allow the ink to flow into the tank. Do not overfill; fill only to the maximum line indicated on the tank.
-
Clean Up Any Spills:
- If you spill any ink, clean it up immediately with a paper towel or cloth. Ink can be difficult to remove once it dries.
-
Close the Ink Tank Cover:
- Once the ink tank is filled to the proper level, close the ink tank cover securely.
-
Repeat for Other Colors:
- Repeat the process for any other ink tanks that need refilling.
-
Close the Printer Cover:
- Close the main printer cover and ensure it is securely shut.
-
Plug in and Turn On the Printer:
- Plug the printer back in and turn it on. The printer may go through an initialization process.
-
Run a Test Print:
- Print a test page or a document to ensure that the ink is flowing correctly and the print quality is satisfactory.
Additional Tips:
- Use Genuine Ink: Always use genuine Epson ink bottles or recommended replacements to ensure the best print quality and to avoid potential damage to your printer.
- Avoid Overfilling: Only fill the tanks up to the maximum line to prevent leaks and ensure proper operation.
- Clean the Nozzle: If the printer exhibits issues like streaks or gaps in printing, you might need to clean the print head using the printer’s maintenance functions.
Epson L310
Materials Needed:
- Compatible ink bottles (specific to Epson L310)
- Gloves (optional, to keep your hands clean)
- Paper towels or a cloth (for cleaning any spills)
Steps:
-
Turn Off and Unplug the Printer:
- Ensure the printer is turned off and unplugged from the power source to prevent any accidents and ensure safety during the refill process.
-
Open the Printer Cover:
- Lift the printer cover to access the ink tanks. The cover is usually on the top of the printer and should open easily.
-
Locate the Ink Tanks:
- The Epson L310 has four separate ink tanks: black, cyan, magenta, and yellow. Each tank has a transparent window so you can see the ink levels.
-
Open the Ink Tank Cap:
- Locate the ink tank that needs refilling and open the cap for that color. The cap may have a small latch or be a screw-on type.
-
Remove the Ink Bottle Cap:
- Take the ink bottle for the color you need to refill, and remove the cap from the ink bottle.
-
Refill the Ink Tank:
- Insert the nozzle of the ink bottle into the refill hole of the ink tank. Gently squeeze the bottle to allow the ink to flow into the tank. Be careful not to overfill; stop filling when the ink reaches the maximum line indicated on the tank.
-
Clean Up Any Spills:
- If any ink spills, clean it up immediately with a paper towel or cloth to prevent staining and ensure that the ink does not get on the printer’s components.
-
Close the Ink Tank Cap:
- After refilling, securely close the cap of the ink tank. Make sure it is tightly sealed to prevent leaks.
-
Repeat for Other Colors:
- If other ink tanks also need refilling, repeat the above steps for each color.
-
Close the Printer Cover:
- Once all the ink tanks are refilled and capped, close the printer cover securely.
-
Plug in and Turn On the Printer:
- Plug the printer back in and turn it on. The printer may go through an initialization process as it recognizes the new ink levels.
-
Run a Test Print:
- Print a test page or document to ensure that the ink is flowing correctly and that the print quality is satisfactory.
Additional Tips:
- Use Genuine Ink: Always use genuine Epson ink bottles or approved alternatives to ensure optimal performance and avoid potential damage to your printer.
- Avoid Overfilling: Do not overfill the tanks. Fill only to the maximum line to prevent leaks and ensure proper operation.
- Check for Leaks: After refilling, check the area around the ink tanks to ensure there are no leaks.
Epson EcoTank L3210
Materials Needed:
- Compatible ink bottles for the Epson L3210
- Gloves (optional, to keep your hands clean)
- Paper towels or cloth (for cleaning any spills)
Steps:
-
Turn Off and Unplug the Printer:
- Ensure the printer is turned off and unplugged from the power source. This helps avoid any electrical issues and ensures safety during the refill process.
-
Open the Printer Cover:
- Lift or open the printer cover to access the ink tanks. The cover is usually on the top or front of the printer.
-
Locate the Ink Tanks:
- The Epson EcoTank L3210 has four separate ink tanks: black, cyan, magenta, and yellow. Each tank has a transparent window, so you can see the current ink levels.
-
Open the Ink Tank Cap:
- Identify the ink tank that needs refilling and open its cap. The caps usually have a small latch or are screw-on types.
-
Remove the Ink Bottle Cap:
- Take the ink bottle for the color you are refilling and remove the cap.
-
Refill the Ink Tank:
- Insert the nozzle of the ink bottle into the refill hole of the ink tank. Gently squeeze the bottle to allow the ink to flow into the tank. Do not overfill; stop filling when the ink level reaches the maximum line indicated on the tank.
-
Clean Up Any Spills:
- If any ink spills, promptly clean it up with a paper towel or cloth to prevent staining and ensure the ink does not affect other parts of the printer.
-
Close the Ink Tank Cap:
- After filling, securely close the ink tank cap to prevent leaks. Ensure it is tightly sealed.
-
Repeat for Other Colors:
- Repeat the above steps for any other ink tanks that need refilling.
-
Close the Printer Cover:
- Once all the ink tanks are refilled and capped, close the printer cover securely.
-
Plug in and Turn On the Printer:
- Reconnect the power cord and plug the printer back in. Turn it on and wait for the printer to complete its initialization process.
-
Run a Test Print:
- Print a test page or document to check that the ink is flowing properly and the print quality is satisfactory.
Additional Tips:
- Use Genuine Ink: Always use genuine Epson ink bottles or recommended replacements to ensure the best print quality and avoid potential damage to your printer.
- Avoid Overfilling: Fill the tanks only up to the maximum line to prevent leaks and ensure proper function.
- Check for Leaks: After refilling, check around the ink tanks to make sure there are no leaks.
Epson L5190
Materials Needed:
- Compatible ink bottles for the Epson L5190
- Gloves (optional, to keep your hands clean)
- Paper towels or cloth (for cleaning any spills)
Steps:
-
Turn Off and Unplug the Printer:
- Ensure the printer is turned off and unplugged from the power source to avoid any electrical hazards and to ensure safety during the refill process.
-
Open the Printer Cover:
- Lift or open the printer cover to access the ink tanks. The cover is usually found on the top or front of the printer.
-
Locate the Ink Tanks:
- The Epson EcoTank L5190 has four separate ink tanks: black, cyan, magenta, and yellow. Each tank has a transparent window to show the ink levels.
-
Open the Ink Tank Cap:
- Identify the ink tank that needs refilling and open the cap for that color. The cap may have a small latch or be a screw-on type.
-
Remove the Ink Bottle Cap:
- Take the ink bottle for the color you need to refill and remove the cap from the bottle.
-
Refill the Ink Tank:
- Insert the nozzle of the ink bottle into the refill hole of the ink tank. Gently squeeze the bottle to allow the ink to flow into the tank. Be careful not to overfill; stop filling when the ink reaches the maximum line indicated on the tank.
-
Clean Up Any Spills:
- If you spill any ink, immediately clean it up with a paper towel or cloth to prevent staining and ensure the ink does not get on other parts of the printer.
-
Close the Ink Tank Cap:
- After refilling, securely close the ink tank cap to prevent leaks. Ensure it is tightly sealed.
-
Repeat for Other Colors:
- If other ink tanks also need refilling, repeat the above steps for each color.
-
Close the Printer Cover:
- Once all the ink tanks are refilled and capped, close the printer cover securely.
-
Plug in and Turn On the Printer:
- Reconnect the power cord and plug the printer back in. Turn it on and wait for the printer to complete its initialization process.
-
Run a Test Print:
- Print a test page or document to ensure that the ink is flowing correctly and that the print quality is satisfactory.
Additional Tips:
- Use Genuine Ink: Always use genuine Epson ink bottles or approved replacements to ensure the best print quality and avoid potential damage to your printer.
- Avoid Overfilling: Do not overfill the tanks. Fill only up to the maximum line to prevent leaks and ensure proper operation.
- Check for Leaks: After refilling, check around the ink tanks to make sure there are no leaks.
Epson L3150
Materials Needed:
- Genuine Epson ink bottles for the L3150
- Gloves (optional, to keep your hands clean)
- Paper towels or cloth (for cleaning any spills)
Steps:
-
Turn Off and Unplug the Printer:
- Make sure the printer is turned off and unplugged from the power source to avoid any electrical issues or accidents.
-
Open the Printer Cover:
- Lift or open the top cover of the printer. This will give you access to the ink tanks, which are usually located on the side of the printer.
-
Locate the Ink Tanks:
- The Epson L3150 has four separate ink tanks: black, cyan, magenta, and yellow. Each tank has a transparent window so you can see the current ink levels.
-
Open the Ink Tank Cap:
- Identify the ink tank that needs refilling. Open the cap of the corresponding tank. The caps are typically screw-on or latch-type.
-
Remove the Ink Bottle Cap:
- Take the ink bottle for the color you are refilling. Remove the cap from the ink bottle.
-
Refill the Ink Tank:
- Insert the nozzle of the ink bottle into the refill hole of the ink tank. Gently squeeze the bottle to allow the ink to flow into the tank. Be careful not to overfill; fill only up to the maximum line indicated on the tank.
-
Clean Up Any Spills:
- If any ink spills, clean it up immediately with a paper towel or cloth to prevent staining and to ensure the ink doesn’t affect other parts of the printer.
-
Close the Ink Tank Cap:
- Once the ink tank is filled to the correct level, securely close the cap to prevent any leaks.
-
Repeat for Other Colors:
- Repeat the refilling process for any other ink tanks that need to be refilled.
-
Close the Printer Cover:
- After refilling all necessary ink tanks and closing their caps, close the printer cover securely.
-
Plug in and Turn On the Printer:
- Reconnect the power cord and plug the printer back in. Turn it on and allow it to go through its initialization process.
-
Run a Test Print:
- Print a test page or document to ensure that the ink is flowing correctly and the print quality is satisfactory.
Additional Tips:
- Use Genuine Ink: Always use genuine Epson ink bottles or those recommended for your printer model to ensure optimal performance and avoid potential damage.
- Avoid Overfilling: Do not exceed the maximum fill line on the ink tanks to prevent leaks and ensure proper printer function.
- Check for Leaks: After refilling, check around the ink tanks to make sure there are no leaks.
Epson L210
Supplies Needed:
- Compatible Ink Bottles (ensure they are the right type for the Epson L210)
- Gloves (to avoid staining your hands)
- Paper Towels (for cleaning any spills)
- Screwdriver (if needed for accessing the ink tanks)
Steps to Refill Ink:
-
Turn Off the Printer:
- Ensure the printer is powered off and unplugged from the electrical outlet.
-
Open the Printer Cover:
- Open the front cover of the printer where the ink tanks are located. On some models, you may need to lift or open the top cover to access the ink tanks.
-
Locate the Ink Tanks:
- Identify the ink tanks that need refilling. The Epson L210 typically has separate tanks for cyan, magenta, yellow, and black inks.
-
Prepare the Ink Bottles:
- Shake the ink bottles gently before opening them. This helps mix the ink thoroughly.
-
Refill the Ink Tanks:
- Black Ink Tank: Open the cap of the black ink tank.
- Color Ink Tanks: Open the caps of the cyan, magenta, and yellow ink tanks as needed.
- Pour Ink: Carefully pour ink into each tank. Most ink bottles are designed to fit into the tank openings, which helps minimize spills. Pour until the tank is full, but avoid overfilling. Close the tank cap securely after refilling.
-
Clean Any Spills:
- Use paper towels to clean up any ink spills or drips.
-
Close the Printer Cover:
- Once all the tanks are refilled and securely closed, close the printer cover.
-
Power On the Printer:
- Plug the printer back into the electrical outlet and turn it on.
-
Run the Printer’s Ink Reset Procedure (if necessary):
- Some printers may require you to reset the ink levels or run an ink initialization process. Check your printer's manual or on-screen instructions for this step.
-
Print a Test Page:
- Print a test page or a calibration page to ensure that the printer is functioning correctly and the ink is flowing properly.
Tips:
- Avoid Mixing Inks: Use the correct color ink for each tank to prevent color mixing.
- Handle with Care: Ink can stain clothes and surfaces, so handle it carefully and clean up spills immediately.
- Check for Leaks: Make sure there are no leaks from the ink tanks after refilling.
Epson L220
Supplies Needed:
- Compatible Ink Bottles (specific to Epson L220)
- Gloves (to avoid staining your hands)
- Paper Towels (for cleaning any spills)
- Screwdriver (if needed for accessing the ink tanks)
Steps to Refill Ink:
-
Turn Off the Printer:
- Ensure the printer is powered off and unplugged from the electrical outlet.
-
Open the Printer Cover:
- Lift the front cover of the printer to access the ink tanks. On some models, this might be a top cover that you lift up.
-
Locate the Ink Tanks:
- The Epson L220 has separate ink tanks for black, cyan, magenta, and yellow inks. Identify the tanks that need refilling.
-
Prepare the Ink Bottles:
- Shake the ink bottles gently to mix the ink before opening them. This helps ensure the ink is properly blended.
-
Refill the Ink Tanks:
- Black Ink Tank: Open the cap of the black ink tank. Insert the black ink bottle nozzle into the tank and slowly pour the ink in. Avoid overfilling. Close the cap securely after refilling.
- Color Ink Tanks (Cyan, Magenta, Yellow): Repeat the process for the cyan, magenta, and yellow ink tanks. Open the corresponding tank caps, pour the ink carefully, and then close the caps securely.
-
Clean Up Any Spills:
- Use paper towels to clean up any ink spills or drips immediately to prevent staining.
-
Close the Printer Cover:
- Once all the tanks are refilled and securely closed, close the printer cover or front panel.
-
Power On the Printer:
- Plug the printer back into the electrical outlet and turn it on.
-
Run the Printer’s Ink Initialization (if required):
- Many printers need to perform an ink initialization or cleaning process after refilling. This helps to ensure the ink is properly primed and ready for printing. Check the printer’s manual or on-screen instructions for this step.
-
Print a Test Page:
- Print a test page or a calibration page to verify that the printer is functioning correctly and the ink is flowing properly.
Additional Tips:
- Use the Correct Ink: Always use the correct type of ink for your printer model to avoid potential damage or poor print quality.
- Avoid Overfilling: Be careful not to overfill the ink tanks to prevent leaks.
- Handle with Care: Ink can be messy, so handle bottles and tanks carefully and clean up any spills promptly.
Epson TM - C3510
Supplies Needed:
- Compatible Ink Cartridges (ensure they are the correct type for the Epson TM-C3510)
- Gloves (to avoid staining your hands)
- Paper Towels (for cleaning any spills)
Steps to Replace Ink Cartridges:
-
Turn On the Printer:
- Ensure the printer is powered on. If it’s off, press the power button to turn it on.
-
Open the Printer Cover:
- Open the printer cover to access the ink cartridge compartments. The cover usually flips open or lifts up.
-
Locate the Ink Cartridges:
- Identify the ink cartridges that need to be replaced. The Epson TM-C3510 typically uses separate cartridges for black, cyan, magenta, and yellow inks.
-
Remove the Empty Cartridges:
- Press the latch or lever to release the cartridge from its slot. Carefully remove the empty cartridge from the printer.
-
Prepare the New Cartridges:
- Unpack the new ink cartridges. Remove any protective tape or covers from the cartridges.
-
Install the New Cartridges:
- Insert the new cartridge into the corresponding slot. Ensure it is securely seated and locked into place. Follow any specific alignment instructions provided with the cartridges.
-
Close the Printer Cover:
- Once all cartridges are installed, close the printer cover securely.
-
Perform an Ink Initialization (if necessary):
- Some printers may require an ink initialization or alignment process after cartridge replacement. Check the printer’s control panel or software for any prompts or instructions.
-
Print a Test Page:
- Print a test page to ensure the cartridges are installed correctly and that the printer is functioning properly. This helps verify that ink is flowing correctly and that print quality is satisfactory.
Additional Tips:
- Handle Cartridges Carefully: Ink cartridges can be sensitive, so handle them carefully to avoid damaging them or spilling ink.
- Use Genuine Cartridges: For best results and to avoid potential issues, use genuine Epson ink cartridges specifically designed for the TM-C3510.
- Avoid Touching Nozzles: Avoid touching the nozzles or electrical contacts on the cartridges, as this can affect print quality or damage the cartridges.
Epson L3110
Supplies Needed:
- Compatible Ink Bottles (for Epson L3110)
- Gloves (to avoid staining your hands)
- Paper Towels (for cleaning any spills)
Steps to Refill Ink:
-
Turn Off the Printer:
- Ensure the printer is powered off and unplugged from the electrical outlet to avoid any electrical hazards.
-
Open the Printer Cover:
- Lift the front cover of the printer where the ink tanks are located. You might need to lift or open the top cover depending on the printer’s design.
-
Locate the Ink Tanks:
- Identify the ink tanks for the black, cyan, magenta, and yellow inks. Each tank has a cap that needs to be opened for refilling.
-
Prepare the Ink Bottles:
- Shake the ink bottles gently to mix the ink before opening them. This ensures the ink is properly blended.
-
Refill the Ink Tanks:
- Black Ink Tank: Open the cap of the black ink tank. Insert the black ink bottle nozzle into the tank and slowly pour the ink until the tank is full. Be careful not to overfill. Close the cap securely after refilling.
- Color Ink Tanks (Cyan, Magenta, Yellow): Repeat the process for the cyan, magenta, and yellow ink tanks. Open the corresponding tank caps, pour the ink carefully, and then close the caps securely.
-
Clean Up Any Spills:
- Use paper towels to clean up any ink spills or drips to prevent staining.
-
Close the Printer Cover:
- Once all the tanks are refilled and securely closed, close the printer cover or front panel.
-
Power On the Printer:
- Plug the printer back into the electrical outlet and turn it on.
-
Run the Printer’s Ink Initialization (if required):
- Many printers require running an ink initialization or cleaning process after refilling to ensure proper ink flow. Check your printer’s manual or on-screen instructions for this process.
-
Print a Test Page:
- Print a test page or a calibration page to verify that the printer is functioning correctly and the ink is flowing properly.
Additional Tips:
- Use the Correct Ink: Always use the correct type of ink designed for the Epson L3110 to avoid any potential issues.
- Avoid Overfilling: Be careful not to overfill the ink tanks as this can cause leaks.
- Handle Carefully: Ink can be messy, so handle the bottles and printer parts carefully and clean up any spills immediately.
Canon LBP6000
Supplies Needed:
- Compatible Toner Refill Kit (specific for Canon LBP6000)
- Protective Gloves (to avoid staining your hands)
- Paper Towels or Cloth (for cleaning any spills)
Steps to Refill Toner:
-
Turn Off the Printer:
- Power off the printer and unplug it from the electrical outlet to ensure safety during the refilling process.
-
Open the Printer Cover:
- Open the printer’s front cover to access the toner cartridge. You may need to open additional covers or panels depending on the printer’s design.
-
Remove the Toner Cartridge:
- Carefully pull out the toner cartridge from the printer. Handle it with care to avoid spillage or damage.
-
Prepare the Toner Refill Kit:
- Unpack the toner refill kit. It usually includes a toner bottle and a funnel or nozzle for refilling. Shake the toner bottle gently before use to ensure even distribution.
-
Refill the Toner Cartridge:
- Locate the Refill Hole: Most toner cartridges have a designated refill hole or port. This is usually covered with a seal or plug.
- Open the Refill Hole: Remove the seal or plug from the refill hole. If the cartridge doesn’t have a visible refill hole, refer to the cartridge’s manual for the correct location.
- Add Toner: Carefully insert the funnel or nozzle into the refill hole and pour the toner into the cartridge. Be careful not to overfill the cartridge and avoid spilling toner.
-
Seal the Refill Hole:
- After refilling, securely replace the seal or plug on the refill hole.
-
Reinsert the Toner Cartridge:
- Place the refilled toner cartridge back into the printer, ensuring it is properly seated and aligned.
-
Close the Printer Cover:
- Close the front cover or any other panels you opened to access the toner cartridge.
-
Power On the Printer:
- Plug the printer back into the electrical outlet and turn it on.
-
Run a Test Print:
- Print a test page to ensure that the toner is distributed evenly and the printer is functioning correctly.
Additional Tips:
- Avoid Spills: Handle the toner carefully to avoid spills. Toner powder can be messy and difficult to clean.
- Use Proper Toner: Ensure you are using toner that is compatible with the Canon LBP6000 to avoid potential damage or poor print quality.
- Keep it Clean: If you do spill any toner, clean it up immediately with a damp cloth or paper towels. Avoid using a vacuum cleaner as it can spread toner dust.
Brother DCP - T720DW
Supplies Needed:
- Compatible Ink Bottles (for Brother DCP-T720DW)
- Gloves (to avoid staining your hands)
- Paper Towels (for cleaning any spills)
Steps to Refill Ink:
-
Turn Off the Printer:
- Ensure the printer is powered off and unplugged from the electrical outlet for safety.
-
Open the Printer Cover:
- Lift the front cover to access the ink tanks. On some models, you may need to open a top cover or access panel.
-
Locate the Ink Tanks:
- Identify the ink tanks for black, cyan, magenta, and yellow. Each tank will have a separate refill opening.
-
Prepare the Ink Bottles:
- Shake the ink bottles gently before opening them to ensure the ink is properly mixed.
-
Refill the Ink Tanks:
- Black Ink Tank: Open the cap of the black ink tank. Insert the nozzle of the black ink bottle into the tank and carefully pour the ink until the tank is full. Avoid overfilling. Close the cap securely after refilling.
- Color Ink Tanks (Cyan, Magenta, Yellow): Repeat the process for the cyan, magenta, and yellow ink tanks. Open the respective caps, pour the ink carefully, and close the caps securely.
-
Clean Up Any Spills:
- Use paper towels to clean any ink spills or drips to avoid staining.
-
Close the Printer Cover:
- Once all the tanks are refilled and securely closed, close the printer cover or front panel.
-
Power On the Printer:
- Plug the printer back into the electrical outlet and turn it on.
-
Run the Printer’s Ink Initialization (if necessary):
- Some printers may require an ink initialization process to prime the new ink. Check your printer’s manual or follow the on-screen prompts to run this process if required.
-
Print a Test Page:
- Print a test page or a calibration page to ensure the printer is functioning correctly and the ink is flowing properly.
Additional Tips:
- Use the Correct Ink: Always use ink that is specifically designed for the Brother DCP-T720DW to avoid potential damage or poor print quality.
- Avoid Overfilling: Be careful not to overfill the ink tanks to prevent leaks and spills.
- Handle Ink Carefully: Ink can be messy, so handle it carefully and clean up any spills immediately to prevent staining.
Fuji Film ApeosPort C2060
Supplies Needed:
- Compatible Toner Cartridges (specific for the Fujifilm ApeosPort C2060)
- Protective Gloves (to avoid staining your hands)
- Paper Towels or Cloth (for cleaning any spills)
Steps to Replace Toner Cartridges:
-
Turn Off the Printer:
- Power off the printer and unplug it from the electrical outlet to ensure safety during the replacement process.
-
Open the Printer Cover:
- Open the front cover of the printer to access the toner cartridges. On some models, you may need to open additional covers or panels.
-
Locate the Toner Cartridges:
- Identify the toner cartridges for black, cyan, magenta, and yellow. Each cartridge typically has a distinct color.
-
Remove the Empty Toner Cartridge:
- Gently pull out the empty toner cartridge from its slot. Be cautious not to spill toner powder during removal.
-
Prepare the New Toner Cartridges:
- Unpack the new toner cartridges. Remove any protective tape or covers from the cartridges.
-
Install the New Toner Cartridges:
- Insert each new toner cartridge into its respective slot. Make sure each cartridge is properly seated and secured in place. The color of the cartridge should match the label in the printer slot.
-
Close the Printer Cover:
- Once all the cartridges are installed, close the front cover or any other panels you opened.
-
Power On the Printer:
- Plug the printer back into the electrical outlet and turn it on.
-
Run a Test Print:
- Print a test page or a calibration page to ensure that the new toner cartridges are functioning correctly and that print quality is satisfactory.
Additional Tips:
- Handle Toner Carefully: Toner powder can be messy and may stain clothes and surfaces. Handle the cartridges carefully and clean up any spills immediately.
- Use Genuine Toner: For best results and to avoid potential issues, use genuine Fujifilm toner cartridges specifically designed for the ApeosPort C2060.
- Check the Manual: If you are unsure about the installation process or encounter issues, consult the printer’s user manual for specific instructions related to your model.